
How to Install an On Demand Water Heater (and What to Hand Off)
Swapping one tank for another is an afternoon. Installing a tankless water heater is a small construction project: it touches your gas line, your venting, your electrical panel, and, in most jurisdictions, your permit office. This guide explains how to install an on demand water heater in eight phases, marks the ones a capable DIYer can own, and is honest about the ones that belong to a licensed pro.
For a household drawing roughly 41 gallons of hot water a day or less, the U.S. Department of Energy puts a demand-type heater's efficiency edge over a storage tank at 24-34%; near 86 gallons daily that edge narrows to roughly 8-14%. The same DOE page gives tankless units a service life of about 20 years, against the industry's 8-12 for storage tanks.
The legal and safety line: read this before touching anything
- Permits are the norm, not the exception. Gas work, new venting, and often the appliance swap itself are permitted, inspected work in most of the country, including when a homeowner does it. Details in our water heater permits guide.
- Gas connections and vent runs belong to a licensed installer in most jurisdictions, and even where homeowner gas work is technically legal, a mistake risks fire or carbon monoxide, not a puddle. This page describes those phases so you can supervise them, not improvise them.
- Catch a whiff of gas at any point? Get everyone out; once outside, dial 911, then your gas utility's emergency line. Touch no switch, strike no flame, make no call until you are clear of the building. More in our gas leak guide.
- Anything 240V (whole-house electric units, new circuits) is electrician work. Nobody touches the old unit's wires until the breaker is off and a tester proves the circuit dead.
- Scald setting: commission the new heater at 120F, the thermostat setting the CPSC recommends; by the CPSC's exposure table, 140F tap water can cause a third-degree burn in about 6 seconds.
- A CO alarm near the unit is cheap insurance on any fuel-burning install.
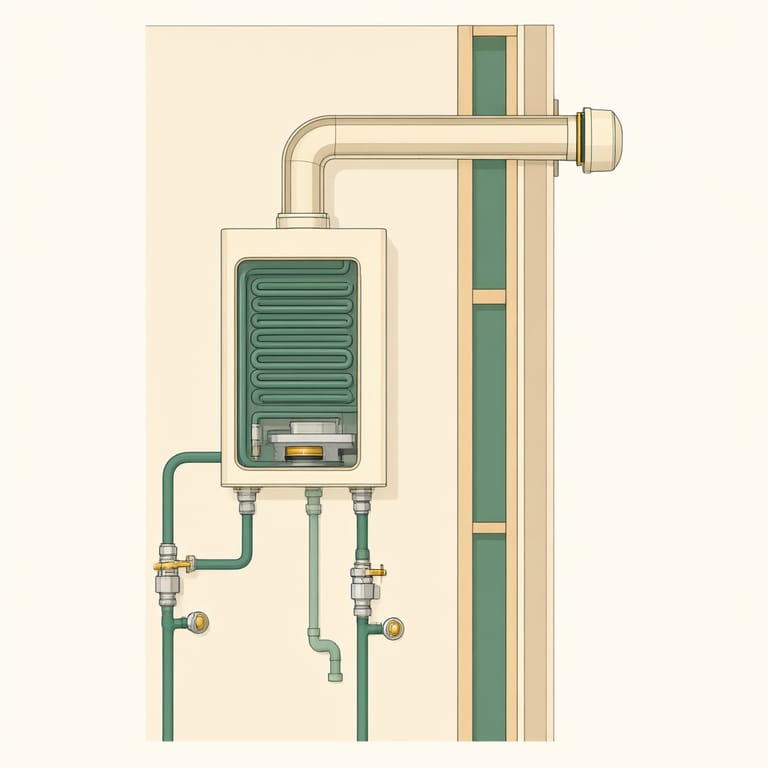
Why this install is bigger than a tank swap
A tank heats water slowly all day. A tankless heater heats it while you shower, which takes a burner several times more powerful, and three things follow:
- Gas supply. The pipe that fed the old tank is frequently too small for a tankless burner. Upsizing the line, sometimes all the way back to the meter, is one of the most common line items in a tank-to-tankless conversion.
- Venting. A tankless unit cannot reuse the old draft hood and flue. It needs its own sealed venting per the manufacturer's manual, and condensing models also need a condensate drain, because their cooler exhaust condenses into acidic liquid.
- Electricity. Even gas-fired units need an outlet for the control board and ignition; fully electric whole-house heaters are a different animal, covered below.
What to buy before install day
Beyond the heater itself: a drill and masonry or wood fasteners rated for the wall, a level, two pipe wrenches, a tubing cutter, thread sealant rated for both gas and water lines, and an isolation valve kit: service valves with purge ports that turn future descaling into a short flush instead of a disassembly. The vent kit must be the one your manufacturer specifies; generic pipe is not a substitute. Budget for a drain pan and condensate tubing if your model condenses. Price the valve kit, vent kit, and fittings against your exact model.
How to install an on demand water heater: all eight phases
| Step | Duration | Homeowner? |
|---|---|---|
| 1. Location and layout | 1 evening | Yes |
| 2. Decommission the old tank | 1-2 hours | Yes (water side); a pro caps the gas line |
| 3. Mount the unit | ~1 hour | Yes |
| 4. Water connections | 1-2 hours | Yes, with plumbing basics (relief valve: pro) |
| 5. Gas line sizing and hookup | varies | Licensed pro |
| 6. Venting and condensate | 2-4 hours | Licensed pro |
| 7. Electrical | varies | Electrician (hardwire or new circuit) |
| 8. Commissioning | ~1 hour | Together with the installer |
- Pick the spot. An exterior wall near the old heater keeps both the vent run and the re-plumbing short. Check the manual's clearances to windows, doors, and soffits; vent terminations have mandatory distances from openings. Checkpoint: you can point to where the vent exits and where condensate will drain before you buy anything.
- Decommission the old tank. Water off, tank drained, lines disconnected, tank hauled out. If the old heater was gas, the line gets capped and leak-checked, and that cap is gas work.
- Mount the unit. Tankless heaters hang on the wall; hit studs or use the manufacturer's masonry anchors, and get it level. Checkpoint: the unit does not move when you pull on it, and there is clear access to the bottom connections.
- Connect the water through the isolation valve kit: cold in, hot out, valves oriented so the purge ports face down. The relief valve on the hot outlet and its discharge line are code-regulated work: have the installer fit them before the line is pressurized (the discharge runs open-ended toward a drain, never capped or plugged). Then pressurize and watch every joint stay dry for ten minutes. Checkpoint: bone-dry fittings under full house pressure.
- Gas: hand it off. The installer calculates total demand for every appliance on the line, sizes the pipe, runs or upsizes it, and leak-tests the whole run. A bid that skips the sizing calculation is a red flag.
- Venting and condensate: hand it off. Slope, joint sealing, termination clearances, and condensate neutralization are exactly the details inspections exist to catch; badly joined venting puts combustion exhaust indoors.
- Electrical. Gas models need a nearby outlet or a hardwired connection. Whole-house electric tankless heaters routinely demand more amperage than an older panel has to spare, and that assessment is an electrician's call, made before purchase, not after.
- Commission it. Fill and purge air through the service valves, fire the unit, and check for error codes. Set the output temperature to 120F and run the farthest hot tap. Checkpoint: steady hot water, no error codes, no gas odor, vent joints warm but sealed.
Ready to talk to a licensed water heater pro?
Call (800) 555-0184Free call. A licensed local water heater installer picks up.Licensed water heater partners in your area- Licensed and insured partner network
- 24/7 call routing
- Free call, no obligation
- You approve the price with the installer directly
Electric on demand water heater install: a different bottleneck
Everything above about gas and venting disappears with an electric unit, and raw amperage takes its place. Whole-house electric models are the reason panel upgrades get quoted. The realistic DIY-adjacent version is a small point-of-use heater under a far-off sink: a modest circuit, no vent, and a manual a first-timer can follow. Have an electrician confirm the circuit and make the 240V connection; do the water side yourself.
Tankless hot water heater replacement: swapping one tankless for another
If the heater you are replacing is already tankless, most of the expensive work is done: the gas line was sized for a tankless burner, the vent path exists, and the outlet is there. Still check three things: whether the new model's BTU input exceeds the old one (a bigger burner can outgrow the existing gas line), whether its venting matches (brands and condensing classes use different vent systems, so the old pipe rarely carries over), and whether the old isolation valves are worth keeping. A same-brand, same-class swap is the closest a tankless job gets to an afternoon; a brand change usually means new venting and a permit all the same.
Mid-job red flags: when to stop and call
Stop and get a pro on-site if: the gas meter itself is flagged as undersized (a utility conversation, not a hardware-store one); there is no code-legal path for the vent to exit; the unit throws ignition or flow error codes on first fire; or hot water surges hot-cold-hot at low flow. If an existing tankless heater is doing that last one, that is a tankless repair visit, not a reinstall.
What it costs to hand the whole job off
Per Angi's 2026 national data, a typical tankless project runs $1,400-$3,900, and complete replacements commonly land at $2,500-$4,500 installed, with tank-to-tankless conversions at the top of those ranges; the delta is mostly the gas, vent, and electrical work. Full breakdown in our tankless cost guide, and the tank-vs-tankless decision itself lives in our tankless hub.
Questions people ask before a tankless install
How long does an on demand water heater install take?
Swapping one on demand heater for another is a half-day to one-day install. A tank-to-tankless conversion usually takes one to two days of installer time, because the gas line, the venting, and the electrical each add hours, and hot water comes back only after commissioning; the permit inspection comes after that.
Can a homeowner legally install a tankless unit?
Parts of it, in most places: mounting and the water connections. Gas piping and venting typically require a licensed contractor, or at minimum a permit with inspection, and 240V electrical is electrician work. Ask your local building department before you buy; some jurisdictions allow no homeowner gas work at all.
What size tankless heater do I need?
Size by flow, not by bedrooms: add up the fixtures you expect to run at once and match that gallons-per-minute figure to the unit's output at your winter incoming-water temperature, since the same heater delivers less hot water in January than in July. Installers run this calculation for a quote; ask to see the numbers.
That is the honest split for this job: own the layout, the mounting, and the water side, and hand off the gas, the venting, and the panel. To have a licensed installer scope those three while you keep the rest, call (800) 555-0184. Calling costs nothing: the number reaches a licensed and insured installer near you in Embercrest's partner network, and you settle scope and price with that installer, not with us.