
DIY Water Heater Replacement: What You Save, What You Risk
Here is the math behind the temptation. A tank-style water heater swap runs $881-$1,826 installed, about $1,346 on average per Angi's 2026 national data, and only part of that buys the heater. The rest is labor and logistics, the prize a DIY water heater replacement chases. Whether it is worth chasing depends on which swap you are attempting and how much of it a homeowner may touch, so score your job before you buy anything. (Line-by-line pro pricing: our labor cost breakdown.)
Score your job first
EIA's household energy survey puts natural gas behind roughly 48% of US water heaters and electricity behind 46%, and that split is the first fork: the electric swap is plumbing plus one circuit to respect; the gas swap adds a fuel hookup and a flue that can push carbon monoxide into the house.
| Scenario | What is involved | DIY verdict |
|---|---|---|
| Electric tank to same-size electric tank | Drain the old tank, set the new one, re-plumb the water; one 240V connection at the junction box | Water side: doable for a patient homeowner with a helper. The 240V wiring: licensed-pro territory, by rule in many jurisdictions |
| Gas tank to same-size gas tank | Everything above plus the gas hookup, a leak test, and the draft vent | Borderline. Water side, yes; gas hookup and venting, licensed pro only (fire and carbon monoxide exposure); many jurisdictions ban homeowner gas work outright |
| Fuel switch or size change | A new circuit or gas run, a new vent path, code upgrades | No. Permitted trade work from the first fitting to the last |
| Tank to tankless conversion | Larger gas line, dedicated venting, electrical work | No. The tankless install guide explains why; it is closer to construction than a swap |
From here the page follows the electric like-for-like swap and flags where gas diverges; bottom two rows, go straight to a professional replacement.
Yes, a DIY water heater replacement needs a permit too
Across most of the US, a water heater swap triggers a plumbing permit, homeowner or contractor, and the inspector is there to catch what fails silently: relief-valve piping, venting, seismic strapping where required, expansion control. Skipped permits resurface at a home sale or in an insurance claim. Fees and filing steps are in our permits guide; read it while the old tank is still connected, since some offices want the permit in hand before work starts.
Five rules that are not up for debate
- Gas first, always: a gas odor at any stage ends the job for now. Everyone leaves the building at once, nobody flips a switch or uses a phone indoors, nothing gets lit, and the two calls (911, then the gas utility) are made from outside only. Full protocol: gas leak guide.
- Electric: most residential heater circuits carry 240V. Shut the breaker, then prove the junction box dead with a non-contact tester; breaker labels are wrong often enough to matter. Moving the conductors (off the old heater, onto the new one) is licensed-pro work; a fresh circuit, panel work, or aluminum branch wiring adds an electrician on top.
- Weight: USGS puts a gallon of water at roughly 8.34 pounds, so a "50-gallon" tank is holding more than 400 pounds of it. Empty it entirely, then move it with a hand truck and a second set of hands.
- Scald risk: the water you are about to drain may sit near 140F, and at that temperature the CPSC's tap water scald data counts roughly 6 seconds of contact before the burn reaches third degree. Let the tank cool before you open the drain.
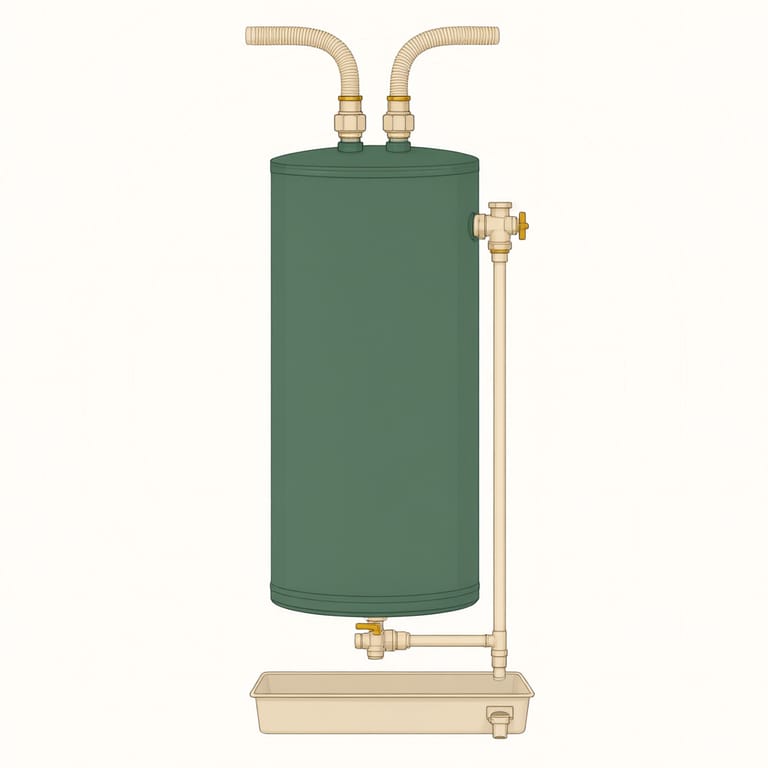
- The TPR valve is not optional plumbing. Should the tank overheat, the temperature-and-pressure relief valve and its pipe are all that stands between a hot tank and a ruptured one. The International Code Council wants that pipe at full diameter, ending where a drip would be noticed, and never capped, plugged, or stepped down in size; capped relief lines are behind real water heater explosions.
DIY replacement of a gas water heater: where the line sits
With a gas tank, draining, hauling, and the water-side hookup mirror the electric job. Two pieces do not. The gas connection (flex connector or black-iron union, sediment trap, shutoff valve) needs a leak test, and a shutoff that will not seat fully ends the project there. The draft hood and vent connector have to climb as they run, hold tight at every joint, and actually pull; a flue spilling combustion gases into the room is a carbon monoxide problem, so a working CO alarm near the heater is part of the job.
A lot of jurisdictions reserve gas appliance hookups for licensed plumbers or gasfitters, and the flue is the first thing a permit inspector studies. Our honest read on swapping a gas water heater yourself: take the water side if the savings matter, and leave the gas connection and venting to a licensed pro. What that visit covers and costs: the gas water heater service page.
Parts and tools for the swap
A pair of pipe wrenches plus channel-lock pliers, a tubing cutter if the lines are copper, thread seal tape and pipe dope, a fresh set of flexible connectors (never reuse the old ones), dielectric nipples or unions wherever copper meets steel, a garden hose, a hand truck, and a drain pan that fits the new heater's footprint. Homes on a closed plumbing system may need an expansion tank too; the inspector will look for one.
Ready to talk to a licensed water heater pro?
Call (800) 555-0184Free call. A licensed local water heater installer picks up.Licensed water heater partners in your area- Licensed and insured partner network
- 24/7 call routing
- Free call, no obligation
- You approve the price with the installer directly
The swap, step by step
- Kill the energy. Breaker off and confirmed dead (electric), or gas shutoff valve a quarter-turn to off (gas). 5 minutes.
- Cool, then drain. Run a hot tap until what is left in the heater is lukewarm, thread the hose onto the drain valve, crack a hot faucet upstairs to let air in, and send the water to a floor drain or out a door. A sediment-packed valve takes its time. 30-90 minutes.
- Disconnect the water side only. Supply lines come apart at the unions. The junction-box wiring (electric) or the gas line and draft-hood vent (gas) belong to the licensed pro, unhooked before the swap and reconnected after, so book that visit first. Fittings that put up a fight mark the hand-off moment, not the penetrating-oil moment.
- Swap the tanks. Old unit out on the hand truck, drain pan down, new heater in place, shimmed plumb with its connections aimed at the lines. 30-60 minutes with a helper.
- Reconnect the water using the new flex connectors and dielectric fittings. Hand-snug, then a quarter turn more; crank harder and the flex connector gaskets split.
- Fill and purge. Open the cold inlet and leave a hot faucet running until the stream stops spitting air. On electric heaters, powering up a partly full tank burns out the upper element in seconds, so fill to the brim before the breaker goes back on.
- The licensed connections. The pro lands the 240V conductors (electric), or remakes the gas line and vent connector and soap-checks every gas joint for bubbles before lighting the pilot per the label (gas), pipes the TPR discharge to the rules above (full diameter, aimed at the floor or pan, air gap, visible end, no cap), and brings the energy back. Your checkpoint: burner or elements cycle, nothing smells at the connections.
- Set the thermostat to 120F, the CPSC's anti-scald temperature and an energy saver (on an electric tank the dial sits beside live terminals, so the pro sets it before power returns). One caveat: Legionella bacteria survive 120F storage. Immunocompromised household? Ask about holding the tank near 140F with anti-scald mixing valves at the fixtures, the setup OSHA's guidance points to.
- Schedule the inspection and file the sticker with the house paperwork.
One 2026-specific reason to slow down before buying electric
Replacing an electric tank above 35 gallons? Under the Department of Energy's finalized efficiency standards, that size class moves to heat pump technology from May 6, 2029, so today's resistance tank is the last of its line. Still a reasonable buy, but price a heat pump model (ENERGY STAR rates them at three to four times a resistance tank's efficiency) before reaching for like-for-like. A heat pump unit is not a DIY swap.
Stop signals: when the DIY ends mid-job
Corroded unions that round off rather than turn; a main or gas shutoff that stops short of fully closed; venting that will not line up with the new draft hood; aluminum branch wiring in the junction box; water showing up where it should not after the refill. Any single one converts "swap" into "repair plus swap," a job a licensed installer quotes every week.
Questions homeowners ask before the swap
Is a DIY hot water heater replacement actually cheaper?
Usually, for the electric like-for-like swap, though by less than the whole labor share: the draining, hauling, and water-side work come out of an installed price Angi's 2026 data puts at $881-$1,826, while the licensed pro's visit for the energy connection and TPR discharge stays on the bill. Set against that the tools you must buy, the permit fee, a helper's afternoon, hauling away the old tank, and a single mistake: one split flex connector or cross-threaded union and the margin is gone.
Does this heater need a repair rather than a replacement?
If the heater is on the young side and the body is dry, probably. Angi gives storage tanks an 8-12 year planning life and puts national repair costs at $228-$1,017, roughly $600 on average in its 2026 data, so swapping an element, thermostat, or valve usually wins over a new tank. Once the steel shell itself weeps, no repair brings it back. The full decision tree: our repair vs replace guide.
Tapping out is not failure
If your DIY water heater replacement stalls at one of the stop signals above, the draining and disconnecting already done still comes off the labor bill. Call (800) 555-0184 and Embercrest connects you with a licensed, insured local installer who picks the job up wherever you left it, with a straight quote before any work and a price you settle directly with the pro.