
Why Your Water Heater Pilot Light Keeps Going Out
One rule sits ahead of every diagnosis on this page: if the room smells of gas (that rotten-egg odorant), nothing gets relit. Get everyone out of the house right away, touching no light switch, phone, or anything else that could spark on the way out; once clear of the building, dial 911, then the gas utility's emergency line. A pilot that has gone out is an ordinary Tuesday; a room that smells of gas is not. Unsure which you have? The gas leak check guide opens with this same rule.
No smell? Then what you have is among the most frequent complaints a gas tank produces, and the odds lean hard toward a cheap fix. Finding the water heater pilot light out once after a windy night is ordinary life with a standing pilot. Relighting it every few days is a component telling you it is done. This page ranks the suspects in the order a technician checks them, shows how the flame itself tells them apart, draws the line between what you can safely touch and what a licensed pro must handle, and puts 2026 national prices on each outcome.
Why the pilot light on a water heater keeps going out: five causes, ranked
- A worn or misaligned thermocouple. Picture a slim copper rod parked in the pilot flame: heated, it produces a faint electrical current, and that trickle alone holds open the safety magnet inside the gas valve. Once the rod burns out, or gets bumped out of the flame, the valve reads the flame as dead and shuts the gas. Result: a pilot that lights beautifully and dies the moment you release the knob.
- A dirty pilot tube or orifice. The opening that feeds the pilot is tiny, and dust plus combustion debris narrow it year by year. The flame shrinks until it no longer throws enough heat at the thermocouple to stay in business.
- Draft. A pilot is a small flame in a metal box. Wind pushing back down the flue, a burner-door seal that no longer seats, or strong air movement through the utility room can physically blow it out. Intermittent, not every time, is the tell.
- Gas supply problems. Supply-line pressure can sag, often when other gas appliances are running hard, and a starved pilot cannot hold. Rare, but real, and likeliest during hard cold snaps when the whole neighborhood is drawing gas at once: about 48% of US households heat water with natural gas, per the US Energy Information Administration, and the coldest nights are exactly when every gas furnace on the street is running too.
- A failing gas control valve. The expensive suspect, and deliberately last: valves do fail, but they get blamed far more often than they deserve, because every cheaper suspect above mimics a bad valve. Rule out everything above before anyone sells you one.
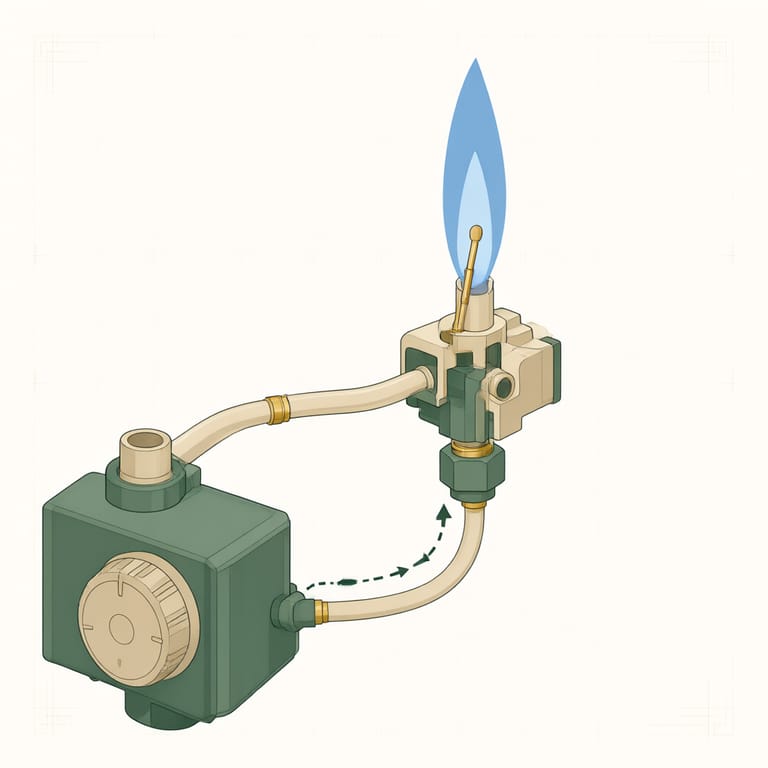
Water heater pilot light out again? Read the flame before you buy anything
The pilot flame is its own diagnostic readout:
- Steady blue cone wrapping the thermocouple tip: healthy. If it still will not hold, suspect the thermocouple itself.
- Weak, yellow, lazy flame: dirty orifice. The flame is starving, not broken. Yellow plus soot or scorch marks on the burner door points to incomplete combustion and a carbon monoxide risk; that one is a stop-and-call, not a cleaning project.
- Flame that dances, leans, or gutters: draft. Watch it with the burner door on versus off; if the behavior changes, you have found the path the wind takes.
- Dies exactly when you release the pilot knob, every time: textbook thermocouple.
- Pilot fine for days, then out during cold snaps or heavy appliance use: look at supply pressure, not parts.
A sixth suspect on newer tanks: the starved air intake
Gas tanks built in the FVIR era (flammable vapor ignition resistant, the sealed-chamber design) breathe through a flame-arrestor screen down near the floor. That screen collects lint, pet hair, and dust, and a pilot that cannot get air behaves exactly like one with a bad thermocouple: it starves and dies. If the heater shares a room with a dryer or lives somewhere dusty, vacuuming the intake screen at the base is a legitimate first move before any parts get ordered.
How to relight a water heater pilot light, and where DIY stops
The label on the tank carries the relight sequence for that specific model, and it outranks anything generic, this paragraph included. What every label shares: gas control to OFF first, and nothing gets lit until any gas odor has fully cleared out of the room. A smell that lingers past a few minutes means stop; the emergency protocol at the top of this page takes over. From there the knob goes to PILOT and stays pressed for the full count the label gives, feeding the flame while the thermocouple heats up, and is released only once the flame holds by itself. Back to ON, then give the burner a while to reheat the tank before judging anything.
Homeowner territory ends about there. On the safe side: relighting per the label, vacuuming the intake screen, checking that the burner access door and its gasket seat properly, watching the flame, and noting when the outages happen. On the licensed-pro side: anything that opens a gas connection (the gas control valve, the supply line, the pilot tube fittings), anything involving the flue or venting, and any gas odor that comes back after clearing. Gas piping is code-regulated work across the US, and a fitting cranked "one more quarter turn" on a live line can leak worse than the fault you started with.
Ready to talk to a licensed water heater pro?
Call (800) 555-0184Free call. A licensed local water heater installer picks up.Licensed water heater partners in your area- Licensed and insured partner network
- 24/7 call routing
- Free call, no obligation
- You approve the price with the installer directly
Call a pro when
- The pilot has gone out more than once in a couple of weeks despite a clean relight
- You see soot, scorch marks, or melted grommets around the burner door
- The flame is yellow and lazy even after the pilot assembly is cleaned
- Any gas odor returns after clearing: stop and treat it as a gas leak
- The pilot is out and the tank is already cold right now; triage the whole system at no hot water
Water heater pilot light out and a cold tank tonight? (800) 555-0184 connects you with a licensed, insured local water heater pro: free call, partner installers on the line seven days a week, and every repair priced and approved directly between you and the installer.
What each outcome costs to fix
Use these 2026 national ranges to calibrate urgency, not to write the quote; the installer prices the actual job and you approve it directly.
| Likely cause | The fix | Typical 2026 cost and source |
|---|---|---|
| Draft, dirty orifice, clogged intake screen | Cleaning, reseating the burner door, blocking the draft path | No parts; a pro visit sits at the low end of the $228-$1,017 national repair range, average about $600 (Angi, 2026) |
| Worn thermocouple | New thermocouple, or a full pilot assembly on sealed-combustion units | $20-$30 for the part (HomeGuide, 2026); installed, the low end of the same repair range |
| Low gas supply pressure | Your gas utility checks the meter and regulator first | Depends on what they find; no parts on the heater |
| Failed gas control valve | Valve replacement, licensed pro only | $200-$750 (HomeGuide, 2026) |
| Tank near the 8-12 year planning life (Angi, 2026) with rust, leaks, or sediment noise on top of the pilot trouble | Replacement usually beats repair | $881-$1,826 installed for a standard tank, average about $1,346 (Angi, 2026) |
The $20-$30 part behind most of this
Per HomeGuide's 2026 national data, a replacement thermocouple is a $20-$30 part. What you are really paying a pro for is everything around it: shutting down and purging the gas correctly, seating the new probe at the right depth in the flame, leak-testing the connections, and confirming the burner cycles properly. On many sealed-combustion units the thermocouple only comes as part of a burner assembly, which moves the price up a tier. Details, the honest DIY version, and full pricing are on the thermocouple replacement page.
When it really is the gas control valve
If a correctly seated thermocouple tests good, the pilot assembly is clean, and drafts are ruled out, then the valve that is supposed to hold the gas open is the last suspect standing. HomeGuide's 2026 range for gas control valve work runs $200-$750, which is real money on an aging tank: on a unit near the end of the industry's 8-12 year planning window (Angi, 2026), get a replacement quote alongside the repair quote before deciding, and run both through the repair or replace guide. What the job involves is covered under gas control valve replacement, and it is licensed-professional work, not a DIY candidate, because every connection it touches carries gas.
After it stays lit: set the temperature deliberately
Relighting resets nothing, but it is the moment most people finally look at the dial. Two facts belong together here. The CPSC recommends 120F at the faucet, the setting that heads off most scald injuries: water at 140F needs only about 6 seconds to cause a third-degree burn, while 120F water takes roughly 5 minutes to do the same damage. The catch: Legionella bacteria ride out 120F storage; OSHA's guidance calls for 140F in the tank, with the scald risk handled at the fixtures instead. Households with immunocompromised members should ask their installer about storing hot and mixing down with a thermostatic mixing valve; that setup gets both numbers right.
None of the five patterns match?
Then the pilot may be the messenger rather than the fault: a tank that keeps losing its flame while also rumbling, weeping at the fittings, or running lukewarm is usually describing its age, not a single part. The repair library sorts every other symptom a tank can produce, and a free call to (800) 555-0184 reaches a licensed local pro who can diagnose it at the tank instead of over a search box.